Category Archives: Blog
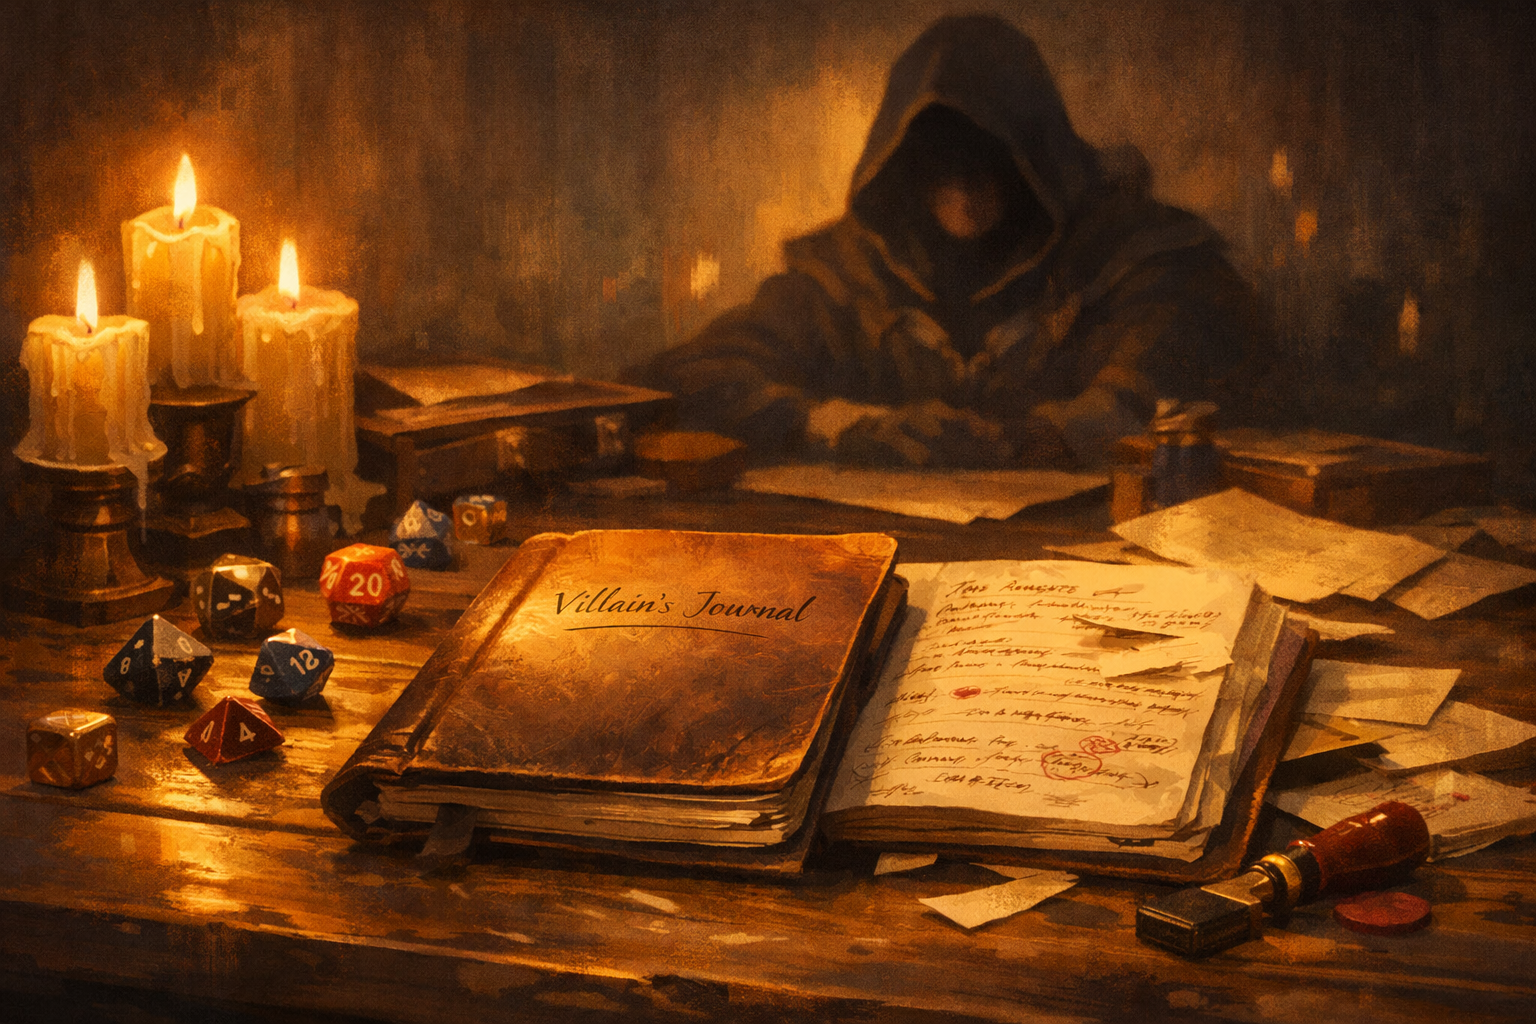
Stop Losing Your Villains Between Sessions
Your villain keeps disappearing.
They show up for a monologue. They get foiled. Then they vanish for three sessions while the party explores ruins, shops for gear, and argues about marching order. When they finally return, your players have to ask, “Wait, who was this again?”
That is not a villain problem. That is a presence problem.
The solution that finally fixed this for me was simple, low-effort, and repeatable: I started keeping a villain’s journal.
Not a novel. Not a lore dump. One short entry between sessions, written in the villain’s own voice. That single page quietly started doing my plot work for me. It tracked the villain’s progress, generated hooks, and made the antagonist feel active even when the party never saw them.
This article breaks down how the Villain’s Journal works, why it solves the presence problem, and how to use it as a story engine rather than extra homework.
The real reason villains feel flat
Most Game Masters do not struggle to invent villains. They struggle to maintain them.
Early on, the villain is vivid. They have a goal, a look, maybe a signature threat. Then play begins. The party zigzags. Side quests happen. Sessions pass. The villain freezes in time, waiting politely for the heroes to come back.
Players feel this immediately, even if they cannot articulate it. A villain who does nothing off-screen feels less like a person and more like a quest marker.
The fix is not more scenes with the villain. The fix is giving the villain something to do when the camera is not on them.
That is where the journal comes in.
What the Villain’s Journal actually is
The Villain’s Journal is a private GM tool written from the antagonist’s point of view. Each entry represents what the villain does between sessions.
It is not a diary of feelings. It is a record of decisions.
Think of it as answering three questions, every time:
- What do I want right now?
- What move do I make to get closer to it?
- What evidence of that move leaks into the world?
That third question is the key. If nothing leaks, the villain still feels absent.
The journal entry becomes your bridge between off-screen action and on-screen play.
Why this works better than notes or outlines
Many GMs already track villain plans with bullet points, timelines, or flowcharts. Those tools are useful, but they are abstract. They live in your head.
The Villain’s Journal does three extra things.
First, it forces perspective. Writing in the villain’s voice sharpens their priorities and biases. You stop thinking “the plot needs this” and start thinking “I would do this.”
Second, it creates momentum. The villain acts every session cycle, whether the players interfere or not.
Third, it produces artifacts. Each entry naturally suggests rumors, consequences, and scenes you can drop into play.
In other words, it is not just tracking the story. It is generating it.
The three-line journal template
To keep this tool fast and sustainable, use a strict format. Three short lines are enough.
1. Objective
What the villain wants this week, not eventually.
2. Move
What concrete action they take to advance that objective.
3. Tell
What sign of this action reaches the wider world.
That is it. No prose requirement. No word count. You can embellish later if you want.
Here is a simple example.
Objective: Secure the third relic before the heroes reach the coast.
Move: Bribe the harbor guild to delay all outbound ships.
Tell: Dockworkers complain about “new paperwork” and sudden inspections.
From this alone, you already have scenes, NPC attitudes, and pressure.
Turning the journal into a story engine
Here is where the journal stops being flavor and starts writing the campaign for you.
Every journal entry should do at least one of the following:
- Advance a villain goal
- Escalate stakes
- Change the world state
- Create a choice for the players
If an entry does none of these, rewrite it.
This approach aligns with how many GMs already think about villain “fronts” or progress clocks, systems popularized in narrative-forward games and widely adapted to fantasy RPGs. In those systems, danger advances unless stopped. The Villain’s Journal is simply that structure written in character.
Each entry ticks the clock forward and narrates the tick.
A short case study: Before and After
Before using the journal, Sally’s campaign villain was a charismatic cult leader. Players liked him. They just forgot about him between appearances.
Sessions focused on dungeons and side quests. The cult only mattered when Sally forced it into view.
After adopting the journal, Sally wrote one entry between each session.
Entry One
Objective: Consolidate control of the inner circle.
Move: Eliminate a wavering lieutenant quietly.
Tell: A trusted NPC mentions the lieutenant “left town suddenly.”
Entry Two
Objective: Secure funds for the ritual.
Move: Divert caravan routes through cult territory.
Tell: Prices spike in town and guards mention missing shipments.
Entry Three
Objective: Remove the heroes as a variable.
Move: Spread rumors framing them as thieves.
Tell: Inns refuse service unless paid upfront.
None of these entries forced a confrontation. But players began talking about the villain constantly. They felt hunted. The world reacted.
The villain had presence without ever stepping on stage.
Making the journal visible without handing it over
You should almost never give players the full journal. That kills mystery and turns tension into trivia.
Instead, leak fragments.
Think in terms of redacted evidence:
- A torn page found on a messenger
- An intercepted letter with half the names scratched out
- A coded entry that becomes readable later
- An NPC paraphrasing a threat they overheard
This approach keeps the villain active in the story without revealing the entire plan.
It also rewards investigation. Players who chase clues feel clever, not railroaded.
How this reduces prep instead of adding to it
At this point, you might be thinking this sounds like more work.
In practice, it replaces work you are already doing poorly.
According to a large Game Master prep survey summarized by Sly Flourish, most GMs spend between one and three hours preparing for a four-hour session, with only a small minority prepping less than thirty minutes. That time often goes into plotting possible outcomes that never happen.
The Villain’s Journal cuts through that by focusing prep on one thing that always matters: what the antagonist does next.
One journal entry often gives you:
- One rumor or NPC conversation
- One environmental change
- One encounter seed
- One complication for a player plan
That is an entire session’s worth of connective tissue in under ten minutes.
Keeping villains competent without railroading
A common fear is that an active villain will feel unfair.
The journal avoids this by separating intention from outcome.
You write what the villain attempts. You do not decide whether it succeeds in full.
If the party intervenes, the journal adapts. The next entry reflects the fallout.
For example:
Objective: Sabotage the ritual site.
Move: Send assassins to destroy the focus stones.
Tell: Survivors report a failed attack and burned wagons.
The villain acted. The players responded. The world changed.
Competence comes from consistency, not from automatic success.
Giving each villain a distinct voice
This tool shines when you lean into voice.
A tyrant’s journal sounds different from a schemer’s. A zealot writes differently from a mercenary.
Voice helps players remember the villain even when they only encounter secondhand traces.
Here are three quick examples.
The Zealot:
“Doubt festers among the weak. Tonight I cleanse it.”
The Warlord:
“The pass will fall. If it does not, I will find someone who can make it fall.”
The Court Manipulator:
“Three smiles today. Two lies. One debt collected.”
You do not need to be poetic. You need to be consistent.
Common failure modes and how to fix them
Problem: The journal becomes a novel.
Fix: Enforce the three-line rule. Add flavor later if time allows.
Problem: Players ignore all villain signs.
Fix: Make tells affect resources, allies, or safety. Flavor alone is optional. Consequences are not.
Problem: The villain feels omniscient.
Fix: Write from limited information. Let the villain be wrong sometimes.
Problem: The journal locks you into a plan.
Fix: Treat entries as intentions, not destiny. Rewrite freely.
Using the journal for factions, not just Big Bads
This technique works just as well for organizations.
Each faction gets a shared journal or rotating voices.
This is especially effective in sandbox campaigns where multiple forces compete.
One week, the thieves’ guild advances. Another week, the church responds. The world feels alive because it is always moving.
Why players respond so strongly to this
Players rarely say, “I like that the villain advanced their clock.”
They say things like:
- “This feels bigger than us.”
- “We can’t ignore this anymore.”
- “They’re always one step ahead.”
Those reactions come from perceived agency. The villain exists beyond the party’s spotlight.
That perception is what turns a name into a nemesis.
Bringing it all together
The Villain’s Journal is not a writing exercise. It is a decision log written in character.
One entry per session cycle is enough to:
- Keep villains present
- Generate story hooks
- Reduce wasted prep
- Maintain momentum
- Make the world react naturally
You do not need to plan every twist. You need to know what your antagonist does next and how the world notices.
That is the entire trick.
Your next step
Before your next session, write one villain journal entry using the three-line format.
Do not overthink it. Do not polish it. Just decide what the villain wants, what they do, and what leaks out.
Then watch how much easier it becomes to improvise everything else.
If you want to go further, try this for every major faction in your campaign for three sessions. You will not just feel the difference. Your players will too.
That is when the story starts writing itself.
How to Run Games for Neurodiverse Players
You don’t need a clinical background to run an accessible table. You need curiosity, structure, and the willingness to adjust how the game shows up at the table.
Here’s the quiet truth most experienced GMs eventually learn: if your game works well for neurodiverse players, it almost always works better for everyone. Clear expectations reduce anxiety. Predictable pacing keeps energy up. Written reminders prevent rules debates. Scheduled breaks stop burnout before it starts. None of that waters the game down. It sharpens it.
This guide is not about diagnosing players or labeling behavior. It is about running games that respect different ways of thinking, focusing, processing, and communicating. It is a how-to, built for real tables, real time constraints, and real groups that want to keep playing together.
Why this matters more than you think
Neurodiversity is not rare at gaming tables. Depending on the definition and population:
- Autism is identified in roughly 1 in 31 children in the United States.
- Adult ADHD prevalence is commonly estimated at around 2.5%.
- Dyslexia and related learning differences affect millions of adults worldwide, with estimates varying based on diagnostic criteria.
You do not need exact numbers to run a better game. The takeaway is simple: odds are high that neurodivergent players are already at your table, even if no one has said anything. Designing for accessibility by default saves everyone from awkward retrofits later.
A mindset shift that changes everything
Before we talk tools, let’s reframe the goal.
You are not “accommodating problem players.”
You are configuring the table.
Think of your game like software. Different tables need different settings. Subtitles on or off. Dark mode or light mode. Auto-save enabled. None of those settings imply something is broken. They imply intention.
Once you approach neurodiversity as table configuration rather than personal exception, the rest becomes straightforward.
Step 1: Build accessibility into Session Zero
Session Zero is where accessibility succeeds or fails. If you wait until someone is overwhelmed mid-combat, you are already behind.
Use an Accessibility Menu, not a spotlight
Instead of asking, “Does anyone have special needs?” provide a menu of options and let players opt in privately or publicly.
Example language you can use verbatim:
“Everyone processes games differently. Here are some table options I’m happy to use. You can tell me now or message me later which ones help you.”
Your menu might include:
- Scheduled breaks every 60–90 minutes
- Camera optional for online games
- Rules summaries after complex scenes
- Visual initiative tracking
- Written quest objectives
- Reduced cross-talk during turns
- Permission to step away without explanation
- Content warnings before intense scenes
The power move here is that everyone gets the same menu. No one has to self-identify to belong.
Always offer private follow-ups
Some players will not speak up in a group, even when invited. Always end Session Zero with:
“If anything comes to mind later, you can message me one-on-one.”
That sentence alone solves more problems than any safety tool.
Step 2: Design a low-ambiguity game loop
Ambiguity is exciting for some players and exhausting for others. Neurodivergent players often struggle not with complexity, but with unclear expectations.
Your job is not to remove uncertainty from the story. It is to remove uncertainty from the process.
Make the game loop visible
At any moment, players should be able to answer three questions:
- What is happening right now?
- What choices do I reasonably have?
- When do I need to act?
You can support this with simple habits:
- State scene goals out loud.
- Summarize options when players hesitate.
- Use phrases like “You have time to think” or “We’re moving into action now.”
This helps autistic players who need clarity, ADHD players who struggle with transitions, and anxious players who fear making the “wrong” move.
Write things down on purpose
Whiteboards, shared docs, index cards, or VTT notes are not crutches. They are memory aids.
Write down:
- Initiative order
- NPC names
- Quest objectives
- Key rules rulings
When information exists outside someone’s head, cognitive load drops instantly.
Step 3: Engineer spotlight and pacing
Many accessibility issues show up during combat or long scenes. The fix is rarely mechanical complexity. It is spotlight control.
Use predictable turn structure
Tell players when they are “on deck.”
Keep initiative visible.
Announce whose turn is coming next.
This reduces anxiety and prevents attention drift.
If you want a practical rule:
- If a player hasn’t acted in 2–3 minutes, summarize and prompt.
- Offer two or three clear choices rather than an open field.
Reduce dead time, not roleplay
Dead time is poison for ADHD players. Long stretches where nothing is expected of them feel endless, even if the scene is interesting.
Solutions that work:
- Shorter turns with clearer decisions
- Rotating spotlight in social scenes
- Cutting away and coming back intentionally
You are not rushing the story. You are trimming the silence around it.
Step 4: Treat sensory input as a game component
Lighting, noise, seating, and visual clutter matter more than most GMs realize.
In-person tables
Simple changes can have huge impact:
- Lower background music volume or remove it entirely
- Avoid flashing lights or candles near eye level
- Allow quiet fidgeting
- Give players control over where they sit
Normalize movement. Standing, pacing, or stepping outside is not disrespectful. It is regulation.
Online tables
Digital play has its own sensory challenges:
- Camera optional policies reduce burnout
- Text chat summaries help players who miss spoken details
- Clear turn order prevents audio chaos
- Captions or chat logs help players with auditory processing differences
Accessibility online is mostly about permission, not technology.
Step 5: Prepare for overload before it happens
Overload does not always look dramatic. It can look like silence, irritability, rules fixation, or sudden disengagement.
The worst response is freezing because you do not know what to do.
Use a simple traffic-light protocol
You can explain this once and then just use it.
- Green: Play continues normally.
- Yellow: You slow down. Reduce cross-talk. Summarize options.
- Red: Pause. Take a break. No explanations required.
If someone steps away, you do not interrogate them later. When they return, you give a brief recap and move on.
This protocol protects dignity and keeps the game flowing.
Step 6: Safety tools are accessibility tools
Lines, veils, X-cards, rewind tools, and content warnings are often framed as emotional safety measures. They are also cognitive safety measures.
Knowing that you can stop or redirect a scene lowers baseline stress. Lower stress means better focus, better play, and better memory.
Use safety tools early and neutrally. Do not reserve them for emergencies. When tools are normalized, they are used responsibly.
Step 7: Close the loop with micro-debriefs
Accessibility is not a one-time setup. It is a living system.
At the end of sessions, ask two questions:
- What helped tonight?
- What should we change next time?
Keep it short. Two minutes is enough.
This does three things:
- It surfaces small issues before they become big ones
- It models that feedback is welcome
- It gives players permission to advocate for themselves
You do not need to fix everything immediately. You need to listen consistently.
A short story from the GM chair
Barry once ran a game where a player went silent every combat. Not disruptive. Not rude. Just… gone.
His first instinct was mechanical. Maybe combat bored them. Maybe the system was wrong.
The real issue was simpler. They could not track initiative mentally while processing tactics and table noise. Once he put initiative on a whiteboard and announced “on deck,” they became one of the most engaged players at the table.
Nothing about the story changed. Everything about the experience did.
That is what good accessibility looks like. Quiet, effective, and invisible once it works.
Common mistakes to avoid
Even well-meaning GMs fall into these traps:
- Over-explaining diagnoses. You do not need medical language at the table.
- Singling players out. Default options prevent awkwardness.
- Treating accommodations as favors. They are table settings.
- Waiting for a crisis. Proactive structure prevents burnout.
If you avoid these, you are already ahead of the curve.
Why this makes you a better GM
Running games for neurodiverse players improves:
- Pacing
- Clarity
- Player trust
- Table longevity
It reduces miscommunication, prevents burnout, and creates space for deeper roleplay. These are not niche benefits. They are core GM skills.
Accessibility is not about lowering difficulty. It is about lowering friction.
Final thoughts and your next step
You do not need to overhaul your campaign. Start small.
For your next session:
- Add one written aid.
- Schedule one break.
- Make one expectation explicit.
Then ask for feedback.
If you want a concrete takeaway, here it is: design your table so no one has to struggle in silence. When players feel safe asking for what they need, the game gets sharper, faster, and more memorable.